Sighting Techniques-Contour Line Still LifeVideo 1
Video 2
Video 3
|
Using Shapes to draw organic objectsBelow are 3 examples of using shapes to quickly draw an object or thing. Notice how each animal is very different from the next, but the technique to draw each one is very similar. You can see how the artist gradually adds detail as the drawings progress. Similar to the drawings below you need to choose an animal, and complete a contour drawing of that animal. You can choose any of the animals from below, including the frog, dog and horse. You will use a pencil for this drawing.
Recall the still life. We started with a contour drawing, then added value, and finally we added the texture. The same steps will be followed when completing the drawing of the animal. |
Perspective Drawing
ONE POINT PERSPECTIVE
|
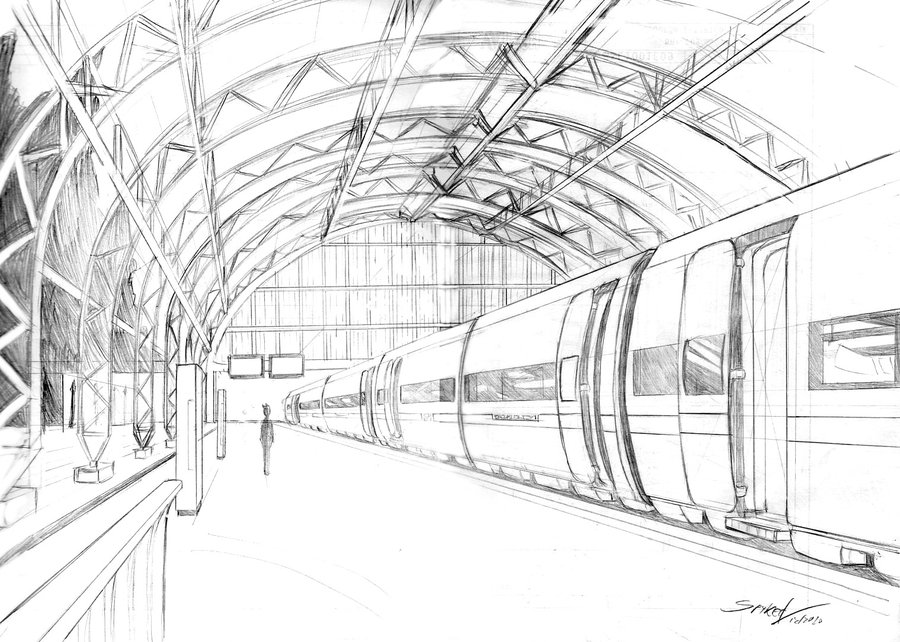
Follow the video to the right and notice similar methods we discussed in class. Remember, it takes time to develop the skills to effectively draw in perspective, wether it be 1-point, 2-point or even 3-point perspective. -As objects move away they become smaller -As objects move away we see less detail -As objects move away there seems to be less color (muted) |
|
1-Point Perspective
|
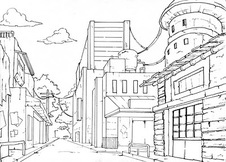
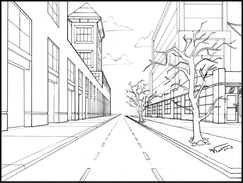
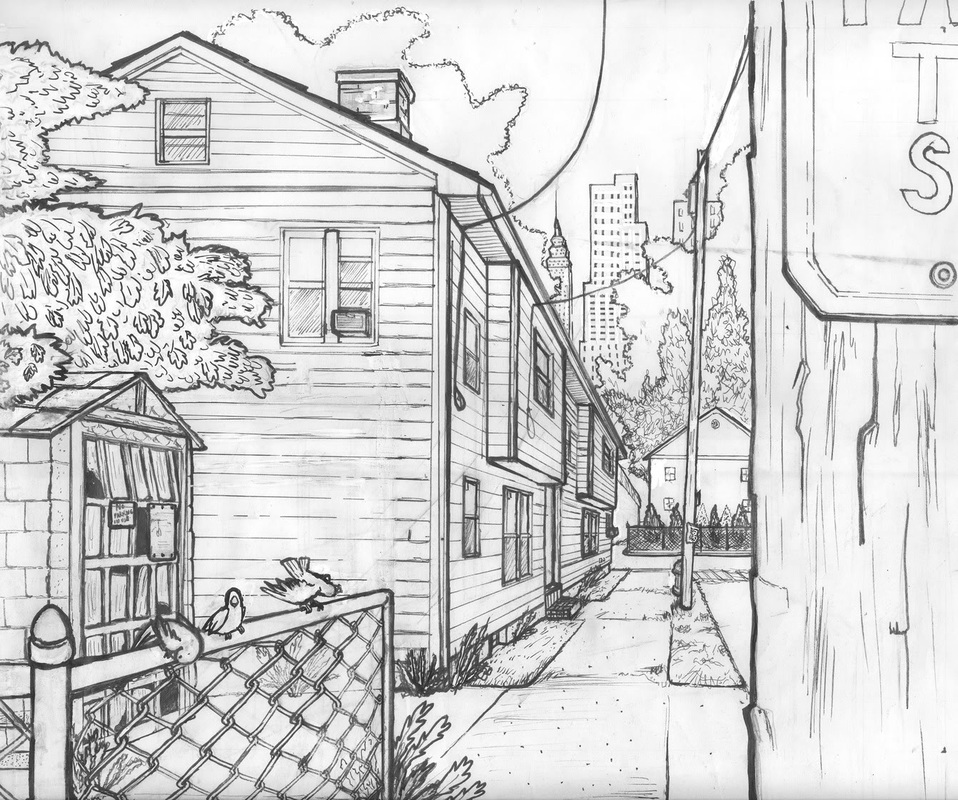
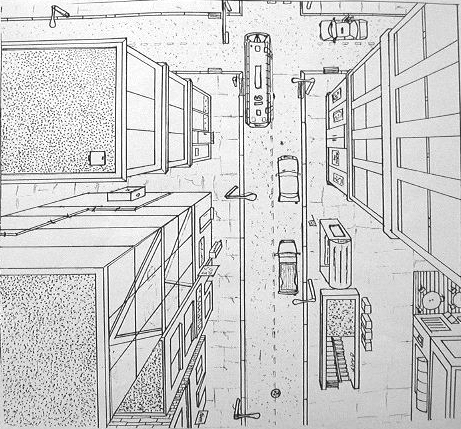
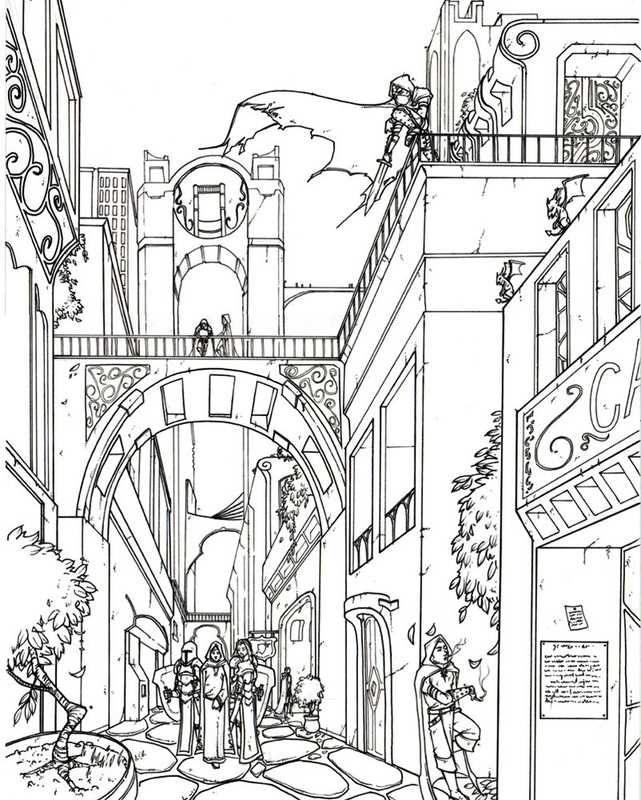
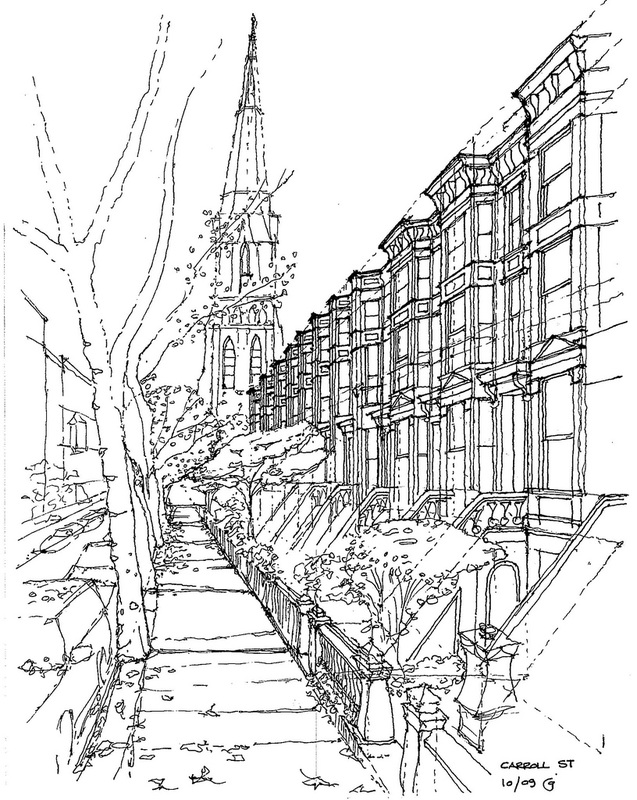
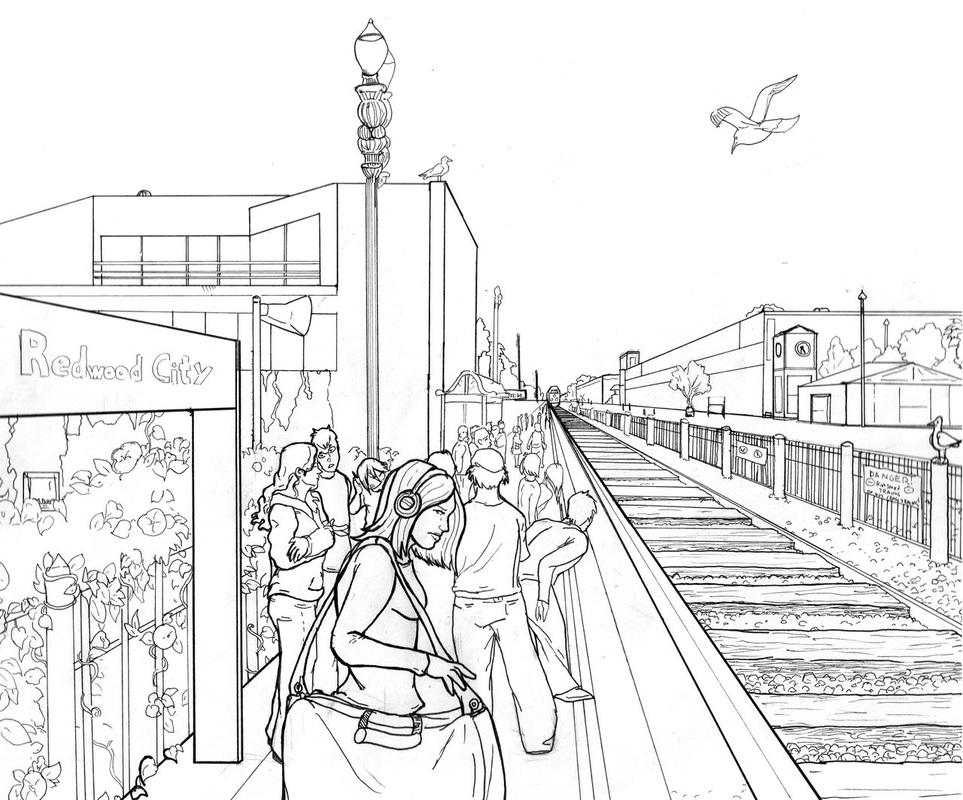
Once you've finished watching the video I'd like you to begin drawing your own scene in one-point perspective. I'd like everyone's scene to be outdoors, and to include a road, similar to the drawings to the left.
Think about different things you could incorporate: -Street Lights -Trees -Buildings -Structures (such as the overpass in the video) DO NOT FOCUS ON THE DETAILS-JUST CREATE THE BASIC SCENE |
|
|
The video to the left is review from what we've done in class. Watch the video and feel free to pause and work at your own pace.
|
|
|
The video to the left is review on adding an intersecting road or street to the existing road or street you've drawn.
|
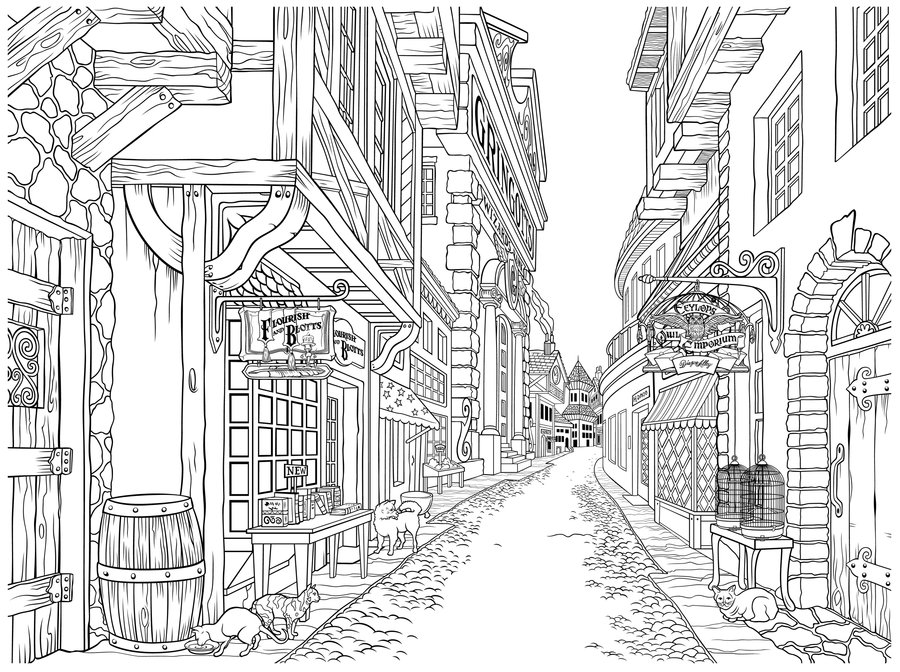
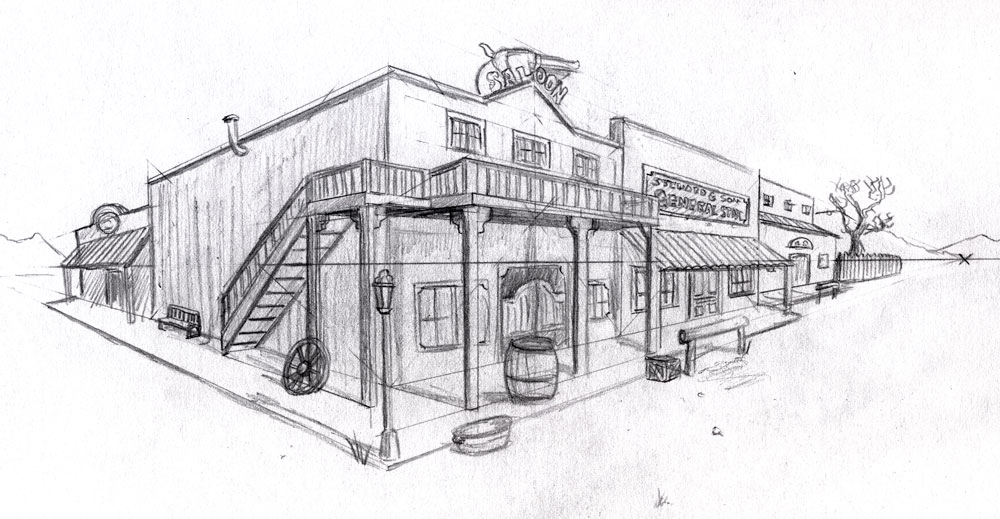
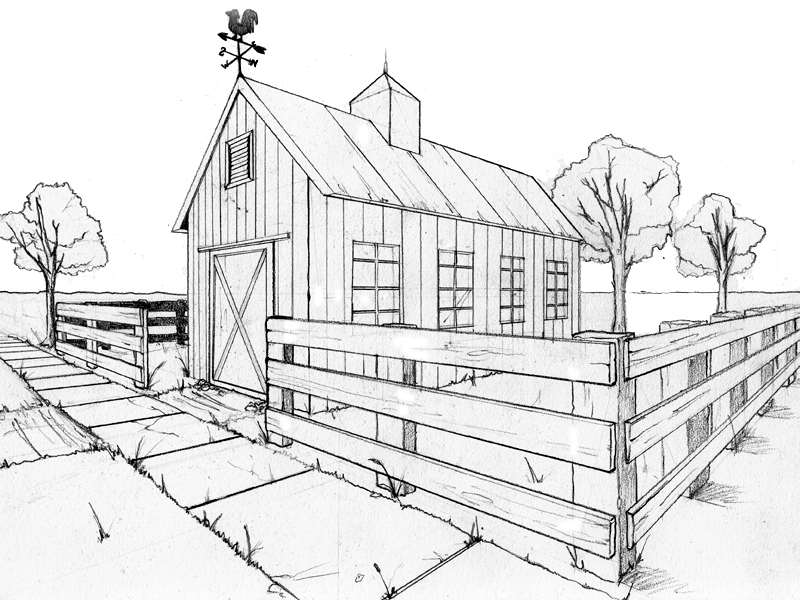
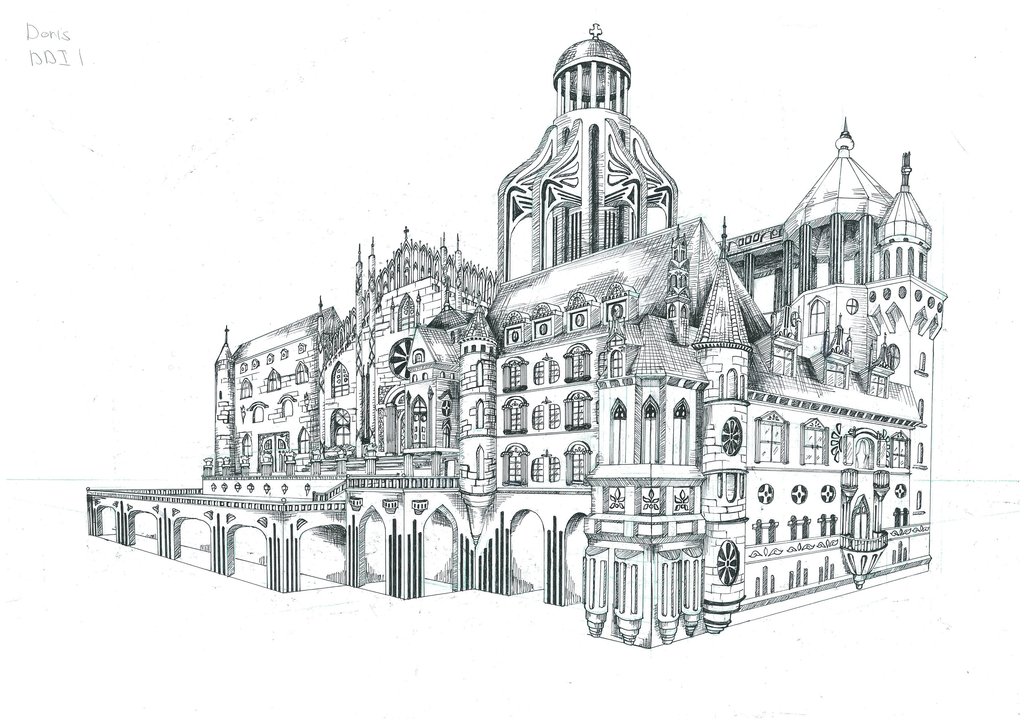
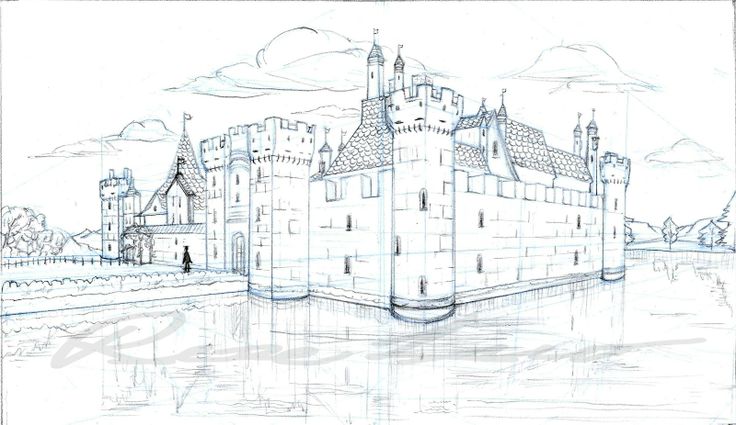
1 Point perspective Drawing
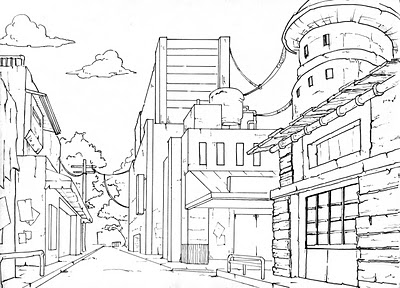
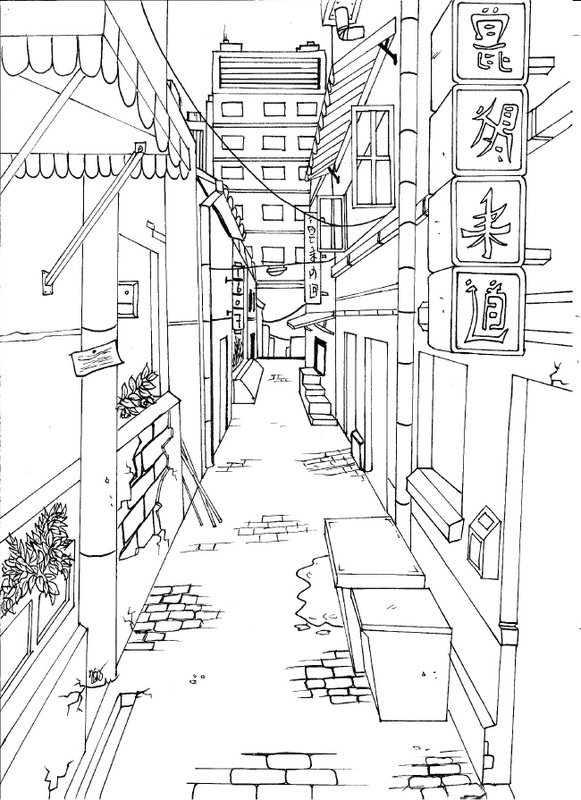
Choose one of the pictures from below to draw. How to begin:
1. Find where the vanishing point and horizon line is. Do this by following some of the strong diagonal lines until they intersect. The intersecting point is the vanishing point.
1. Find where the vanishing point and horizon line is. Do this by following some of the strong diagonal lines until they intersect. The intersecting point is the vanishing point.
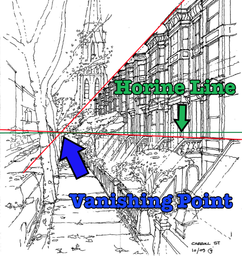
2. Once you know where the vanishing point is you'll immediately be able to figure out where the horizon line is...it is a horizontal line right where the vanishing point is.
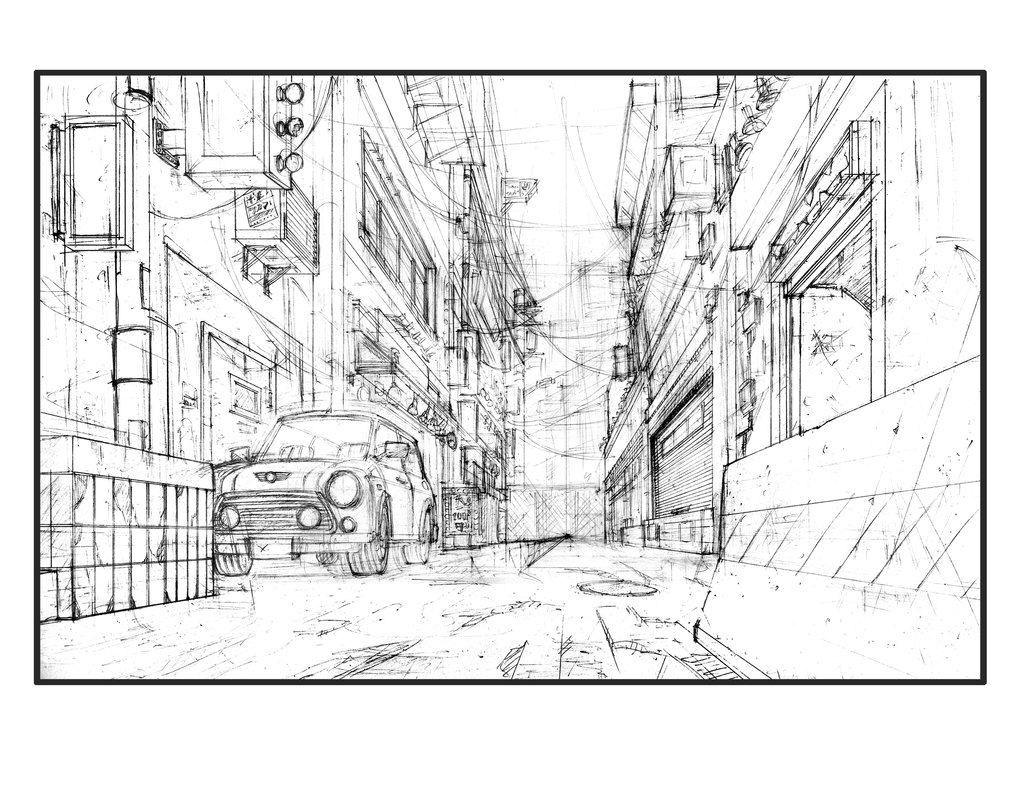

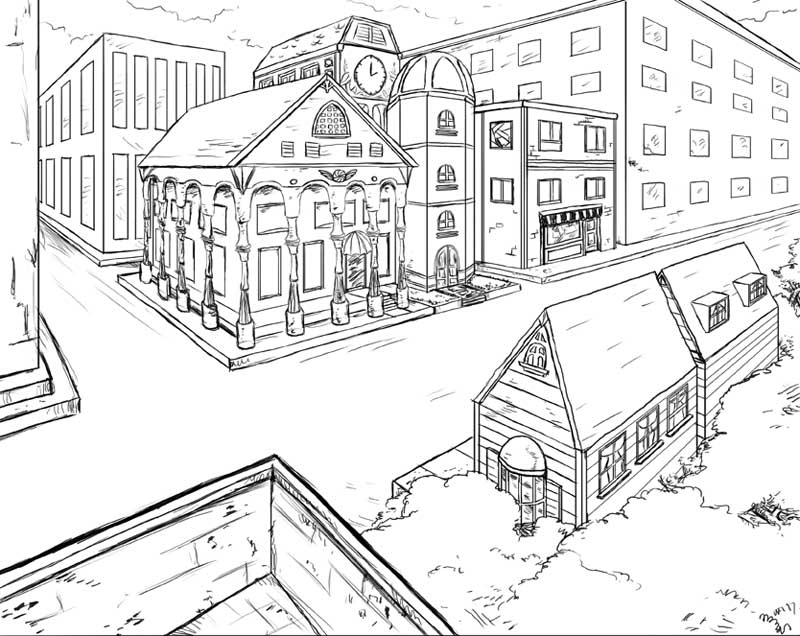
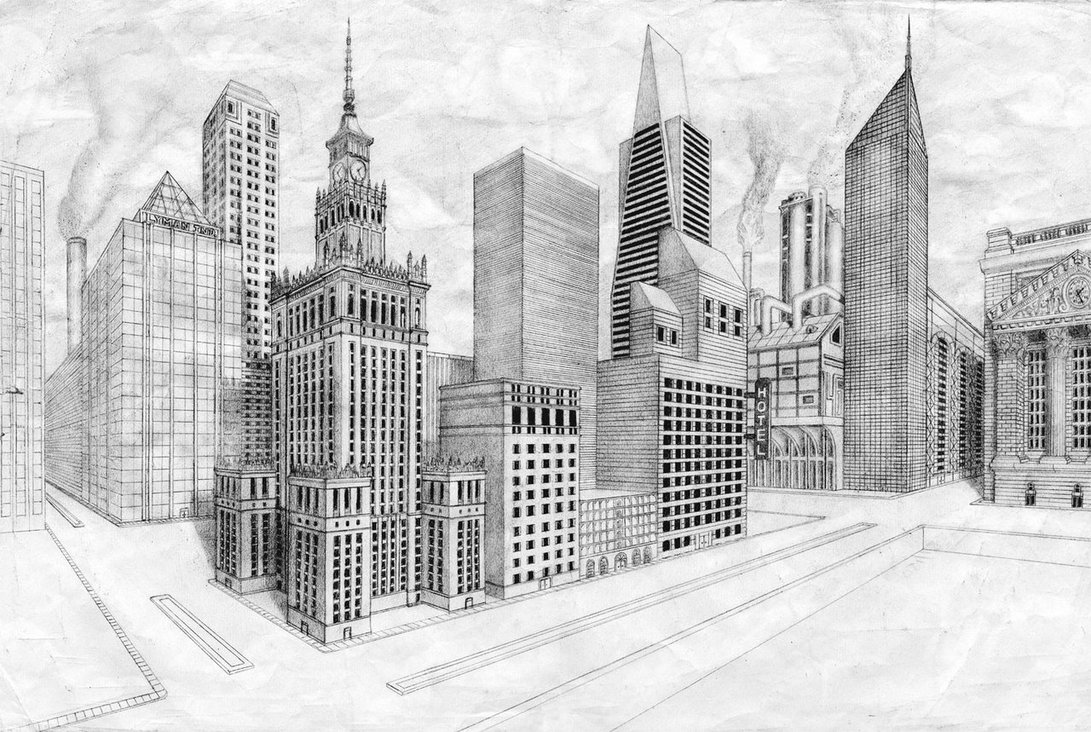
2 point perspective
Watch the video below all the way through, without pausing. Then try to follow along with the video, taking time to pause, working at your own pace. Draw on 9X12 paper.
1.
3 point perspective
Watch the video below all the way through, without pausing. Then try to follow along with the video, taking time to pause, working at your own pace. Draw on 9X12 paper. Staple to 2 point perspective exercise and turn in.
2.
|
Again, similar to the one-point perspective, follow the strong diagonal lines to locate the vanishing points. Notice how the vanishing points aren't on the actual picture. This is very common within art and photography.
Adjust your drawing accordingly, as demonstrated. 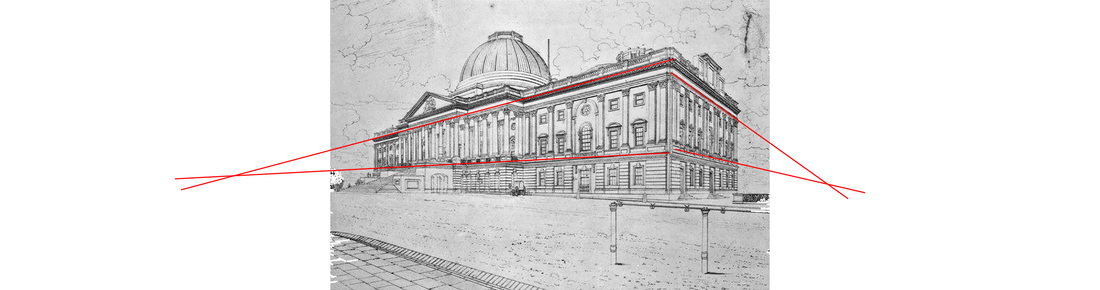
|
|
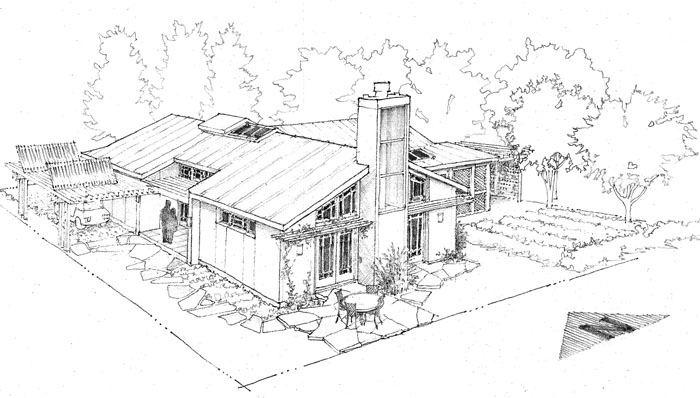
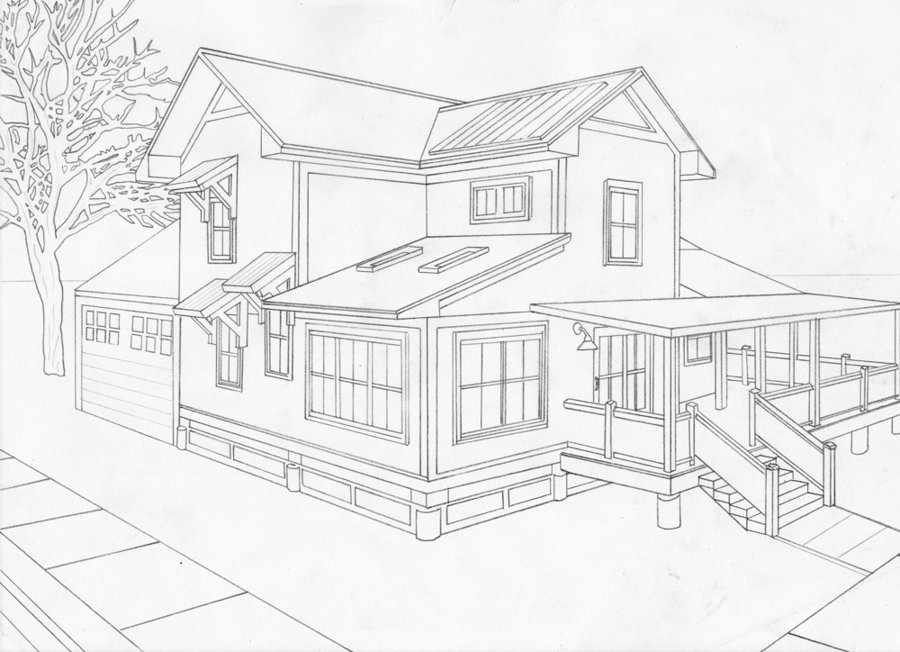


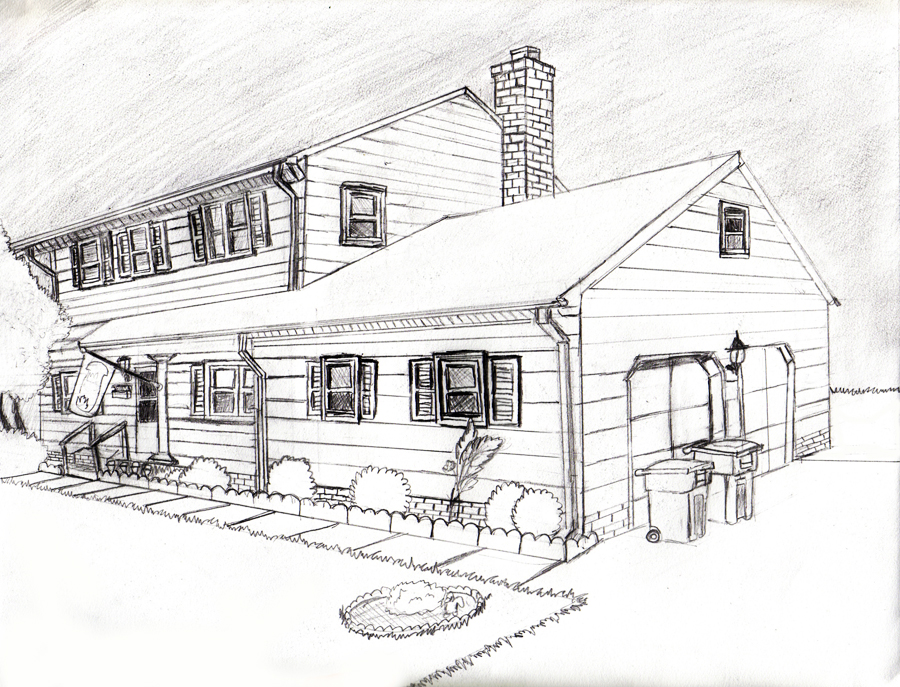

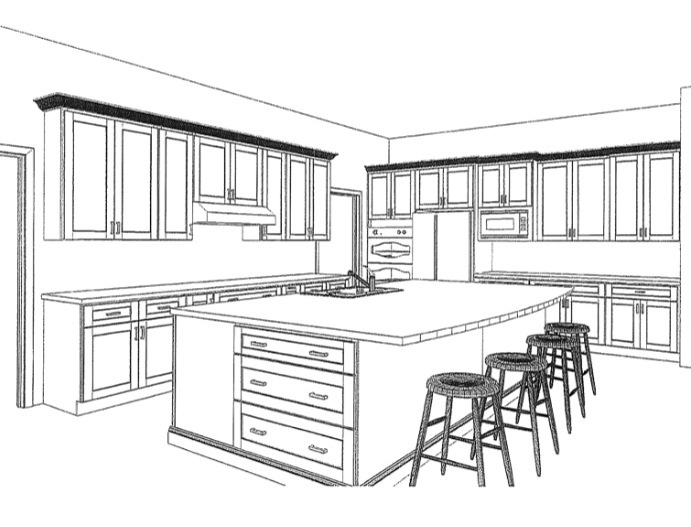

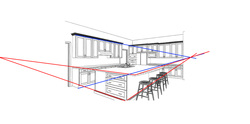
Dream House
Using the techniques of either 1-point perspective, or 2-point perspective, design and draw your dream home. You have a combination of options.
1st, 1 point perspective of the outside of your house
2nd, 2 point perspective of the outside of your house
3rd, 1 point perspective of the inside of your house
4th, 2 point perspective of the inside of your house
1st, 1 point perspective of the outside of your house
2nd, 2 point perspective of the outside of your house
3rd, 1 point perspective of the inside of your house
4th, 2 point perspective of the inside of your house

|
Architects and interior designers do this on a daily basis. They are expected to "bring to life" their designs and ideas, to show their customers, and give them a better understanding of what to expect.
You can see, by using basic 1-point perspective, one can create a realistic environment with depth. |
Do not simply choose a picture to copy, however, you may look at various examples for ideas. If you choose to draw the outside of your house you must include the surrounding landscape and sky. If you choose to draw the inside of your house you must include smaller details, such as pictures on the walls, rugs, etc.
You also have options, such as architectural style. Do you like mid-century modern, bungalow, tudors, cabins, etc. Each of the aforementioned architectural styles has specific interior design elements.
Once you draw out your design, you can add some color, and values, through the use of colored pencils, watercolor, or both. All drawings will be done on 12X18 drawing paper.
If you would like, you can start by using graph paper and planning out a basic floor plan (probably a good idea for the inside of your house). If you're drawing the outside of your home, you might not need the graph paper, however, if you still wish to use it you may to sketch out your ideas.
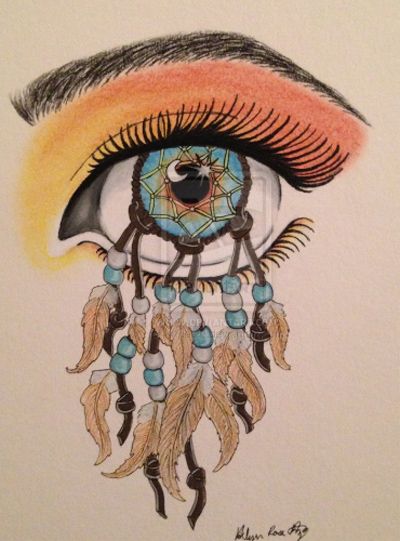
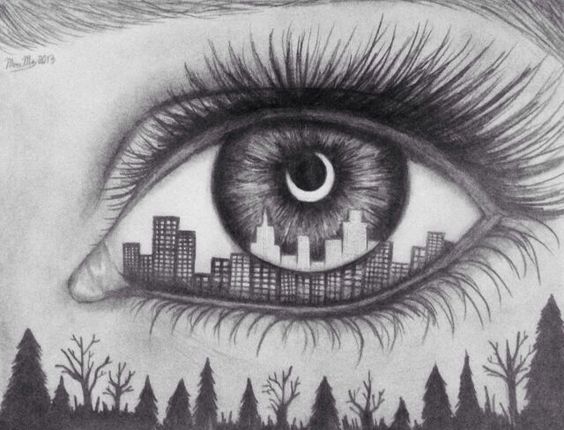
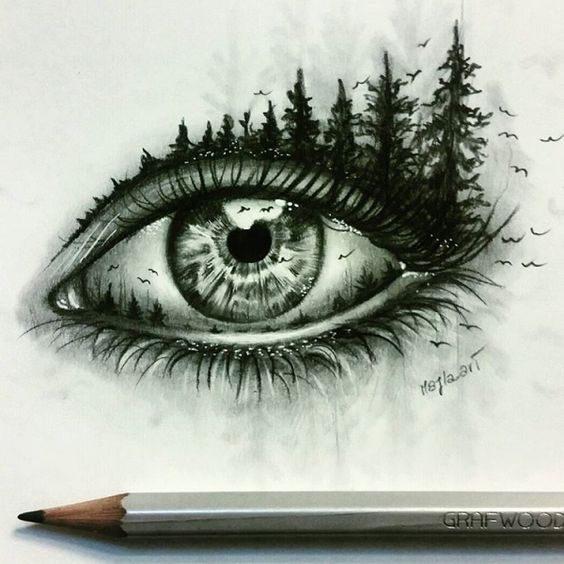
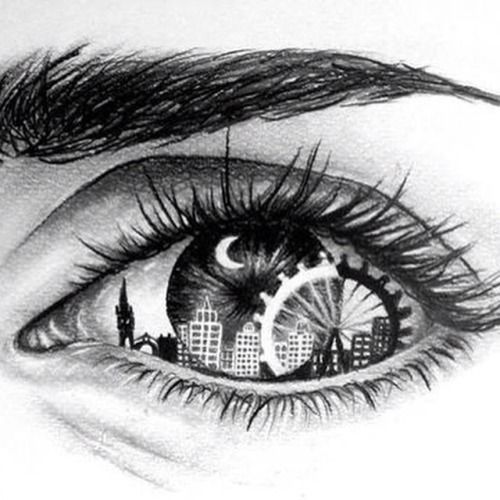
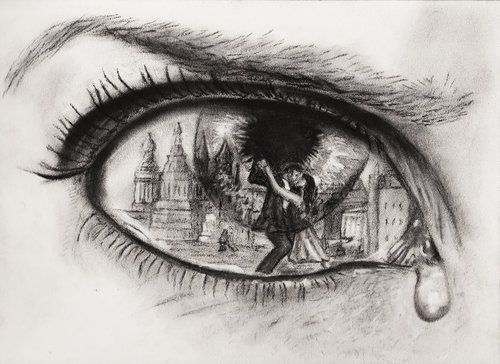
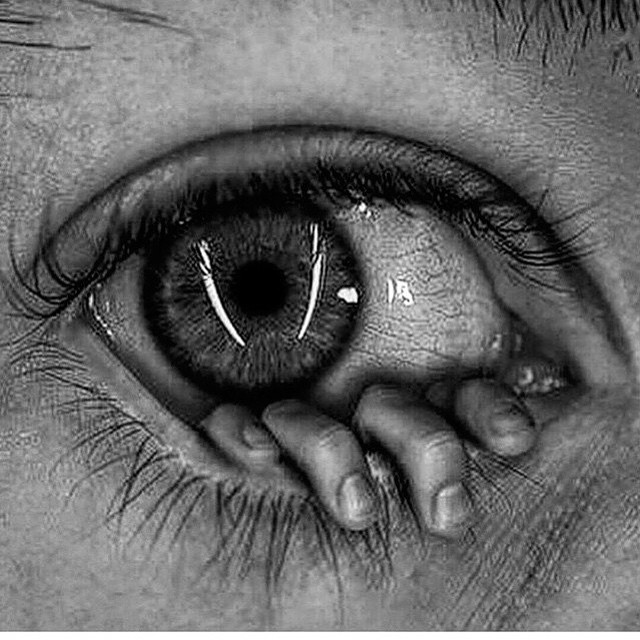
Look into my eyes
|
|
To the left are examples of artwork created by altering the eye. Using them as inspiration, come up with an original design of your own. Work is to be complete on 9x12 drawing paper.
Requirements are: -must use majority of the space on the paper -should incorporate color, OR be completely shaded (color drawings will use colored pencil or artist markers) -work should be original, CAN NOT be copied from picture |


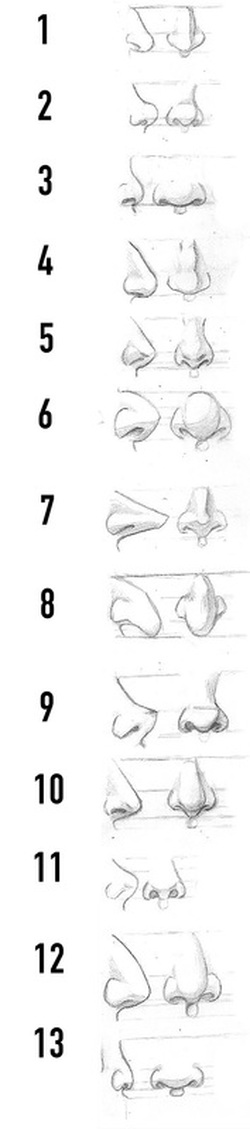
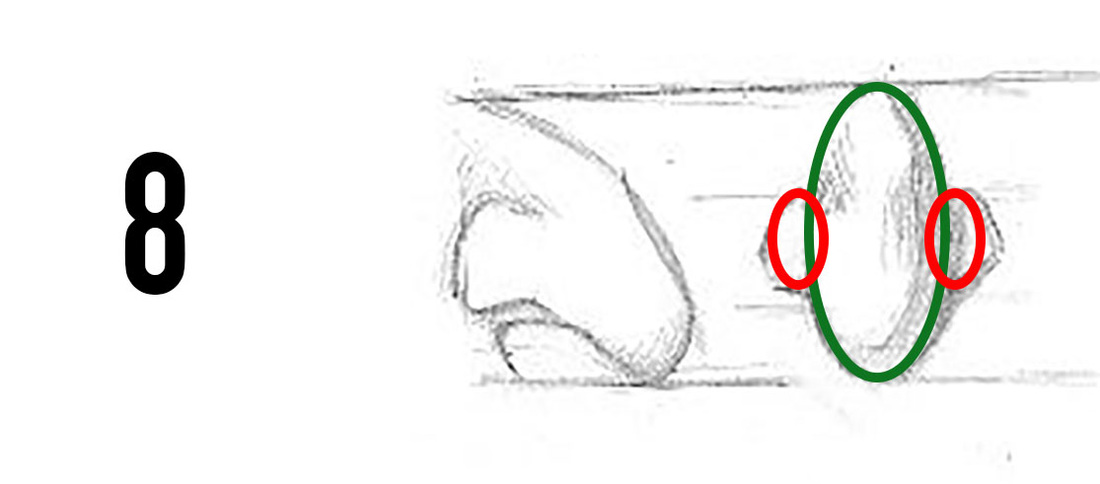
drawing the nose
|
Choose 4 noses from the left to draw, USING THE STEPS DEMONSTRATED IN THE VIDEO ABOVE. You only need to draw the front view of the nose.
It doesn't matter what shape the nose is, the same basic steps will still be followed. For example, if I were to draw nose 8, I would begin with a large oval, instead of a circle, and then place two smaller ovals on each side. Look above. These will be due at the beginning of class the following day. |
how to draw the mouth
Drawing the entire face with correct Proportions
The only thing you'll be missing is how to draw the ears (if you can see them), and the hair. Scroll down to draw the ears.
ears
Again, if you can't see the ears because the hair covers them, that's fine. If not follow the steps below. If you want to draw the ears sticking out more simply make the first shape of the ears bigger (further out) from the head. If you want to draw them closer to the head make the first shape a little smaller (closer) to the head.
Different types of hair
|
|
|
